Importing Excel, CSV, and Clipboard Data
💡 When you begin working with your data in Tablize, you have several options to get your data into the platform. You can import data from Excel or establish a data synchronization connection. Alternatively, you can create a blank table directly in Tablize and input your data manually. Once your data is inside Tablize, you can start your data work.
Tablize supports data import from Excel, CSV files, and clipboard data.
📖 This document will explain how to import data from files, helping you get started with Tablize.
Tablize has prepared sample data for you, which you can download here: Sample Data.
Import Excel or CSV Files
Step 1
Go to the Tablize workspace, click on "New Table," and select "Import local data" from the dropdown menu. This will open the data import window.
Step 2
In the data import window, click on the area to choose a local Excel or CSV file. Click "open" to enter the data preprocessing interface. If no preprocessing is needed, you can click "Next" to complete the data import. For files with multiple sheets, you can switch between sheets for import.
After completing the data import, the data will be imported into Tablize, and you can continue importing more data or start your data processing journey.
Data Preprocessing
After data import, you'll enter the data preprocessing interface where you can:
- Perform preprocessing operations such as "transpose," "clip," "merge rows/columns," and "delete rows/columns."
- Choose the data import mode: "Add data" or "Replace data."
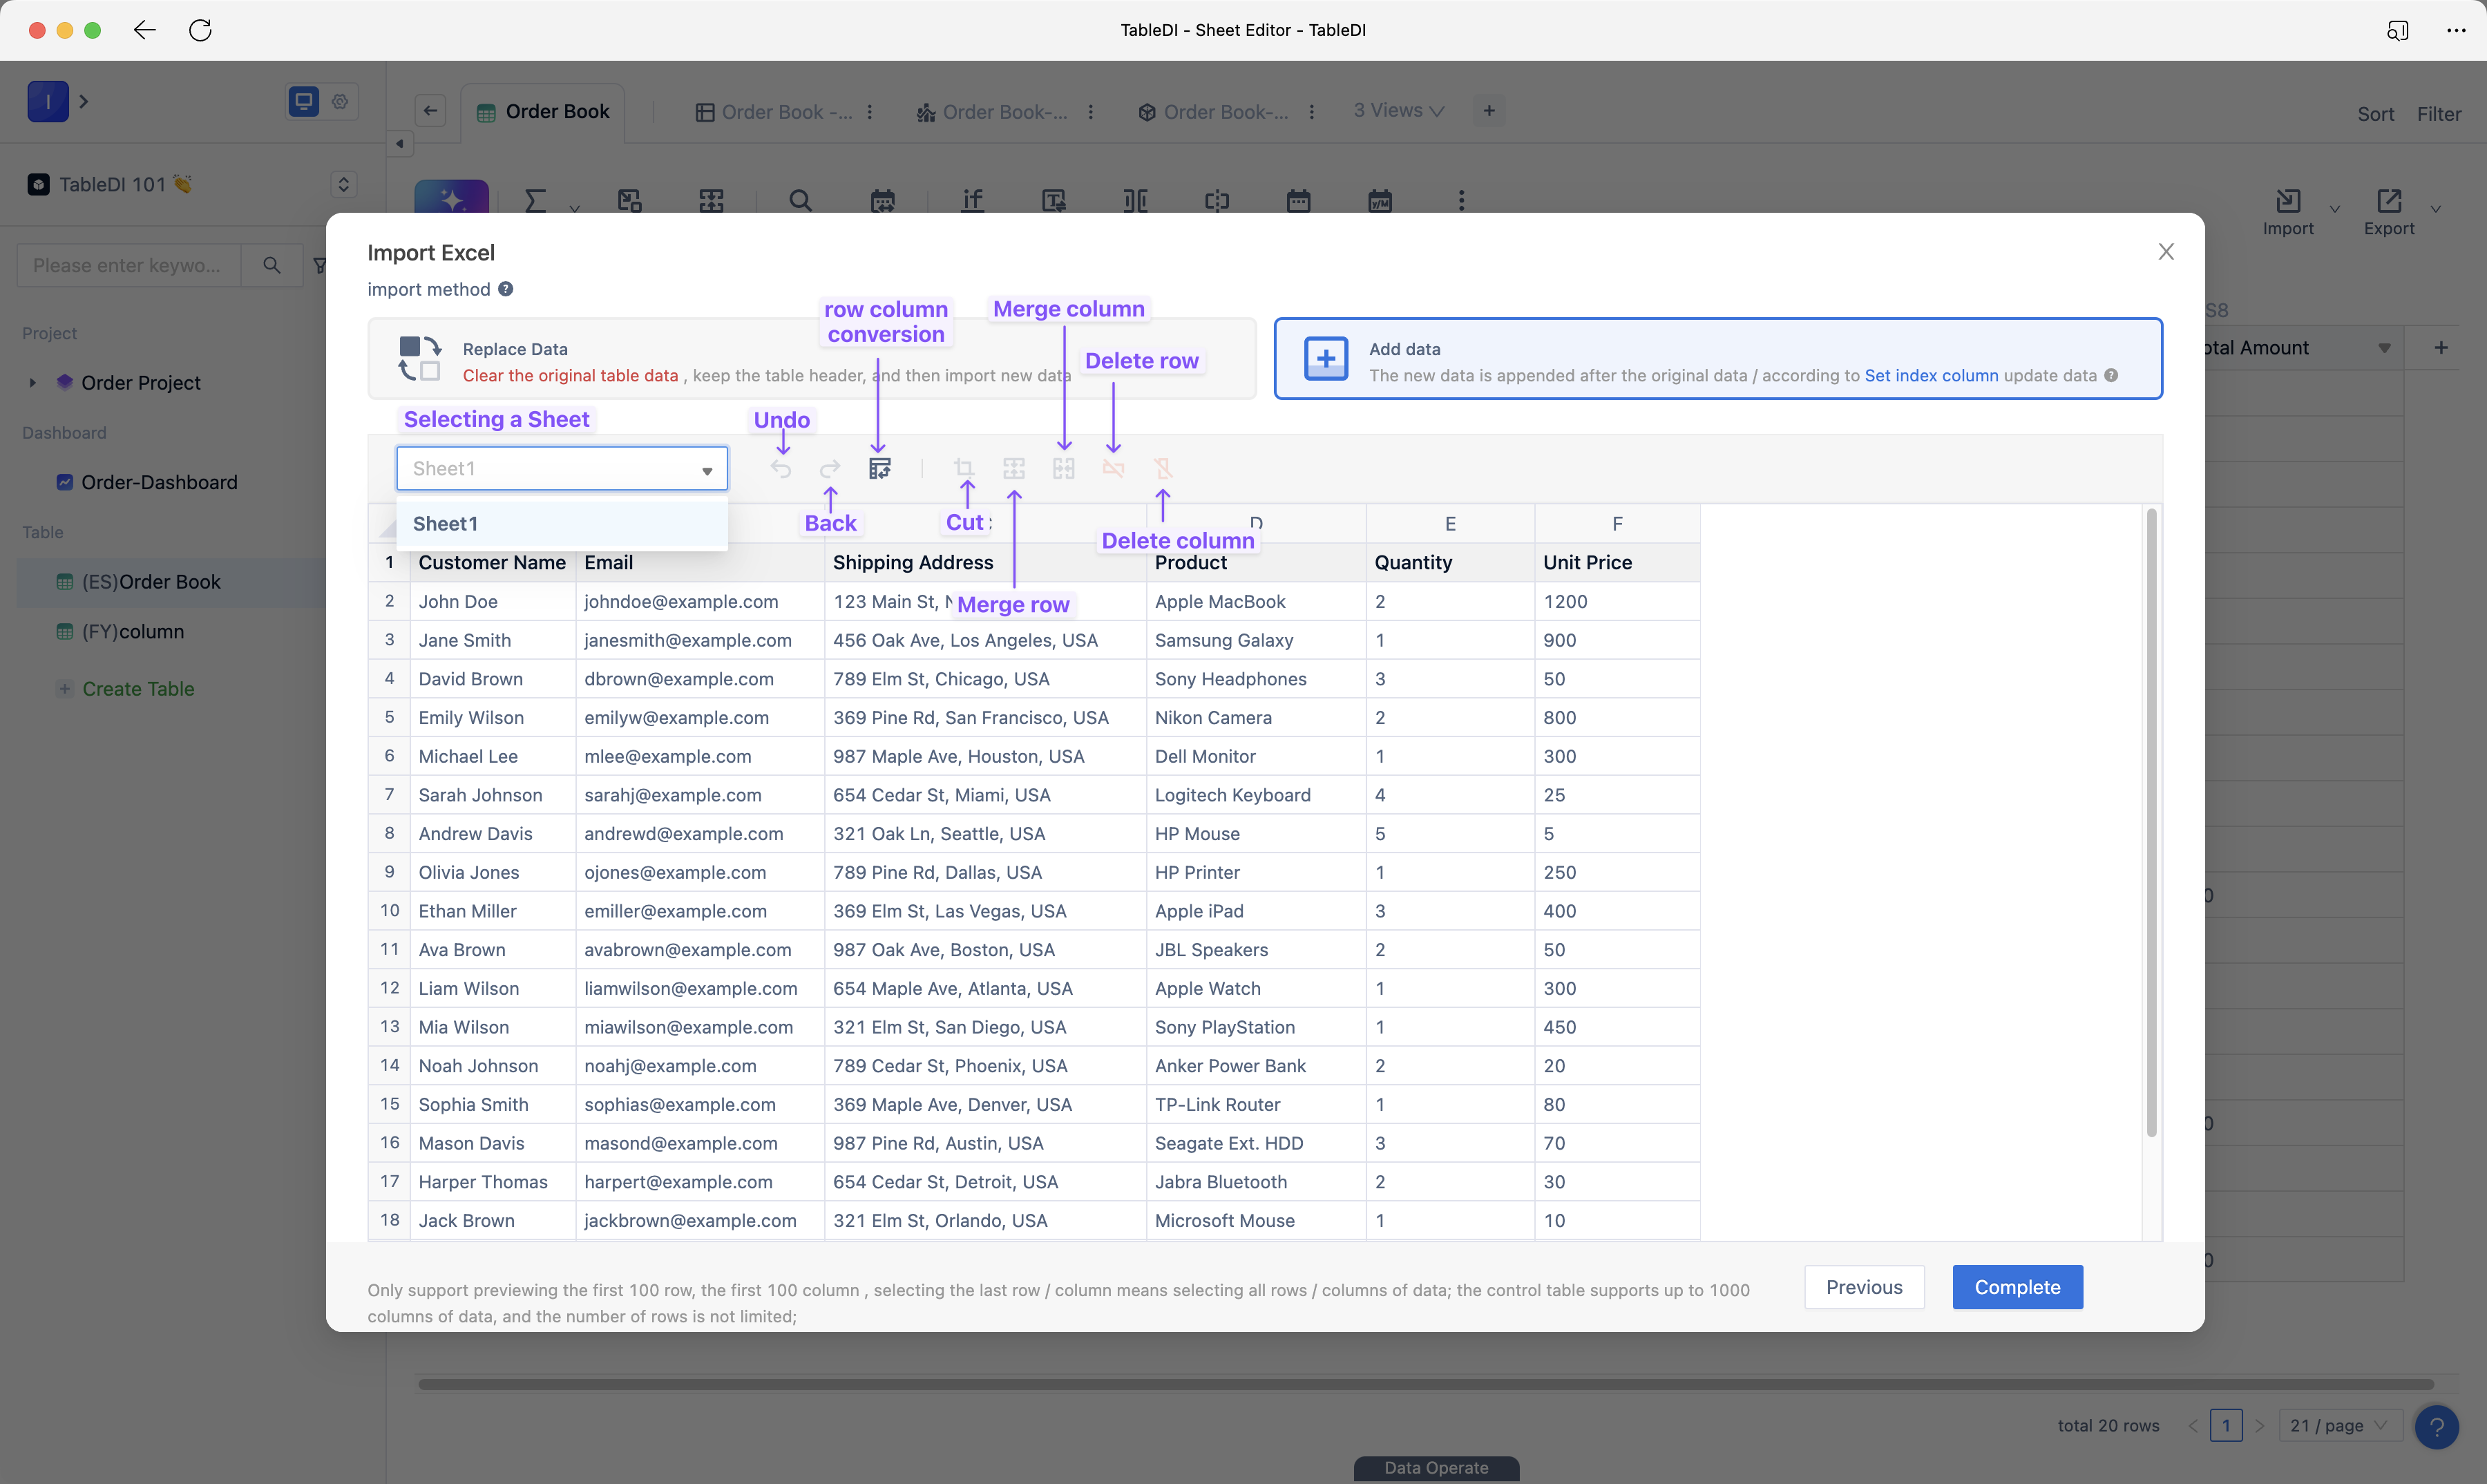
Data Transpose: You can select any cell, and the menu bar at the top of the data browsing window will automatically highlight the transpose icon for rows and columns. A tooltip will appear, indicating the "Transpose" operation. Clicking it will automatically transpose the entire table data.
Data Clip: You can select the data area you want to keep. The menu bar at the top of the data browsing window will automatically highlight the clip icon. A tooltip will appear, indicating the "Clip" operation. Clicking it will automatically delete the data outside the selected area.
Merge Rows/Columns: You can select the data area you want to keep. The menu bar at the top of the data browsing window will automatically highlight the icons for merging rows or columns. A tooltip will appear, indicating the "Merge Rows" or "Merge Columns" operation. Clicking it will automatically merge the selected rows or columns.
Delete Rows/Columns: You can select any row or column in the preview window. The menu bar at the top of the data browsing window will automatically highlight the red icons for deleting rows or columns. A tooltip will appear, indicating the "Delete Rows" or "Delete Columns" operation. Clicking it will automatically delete the selected rows or columns.
Add Data: The new data is appended after the original data or updated according to the set index column.
Replace Data: This option clears the original table data while keeping the table header. Then, it imports the new data.
Paste Data from Clipboard
To paste data from your clipboard into Tablize, follow these steps:
Go to the Tablize workspace and open the data import window.
Copy (Ctrl/Cmd + C) the data you want to import from your file.
Select the data import window and paste (Ctrl/Cmd + V) the copied data.
FAQs
Q1: Does merging cells in Excel affect data import?
A1: Before importing a local Excel file, it's important to check if the original data contains merged cells. If there are merged cells in the data table, Tablize will automatically split these cells during the import process.
Q2: The data order in Tablize is opposite to Excel?
A2: Tablize operates in a database-like manner, where the most recent data is always at the top row of the table editor, making it convenient for your editing and viewing purposes.